Products
As the final step in creating your catalogue, begin adding your products by entering their details, uploading images, and, if applicable, adding variations. The product creation module has three tabs: primary information, description and attributes, and gallery.
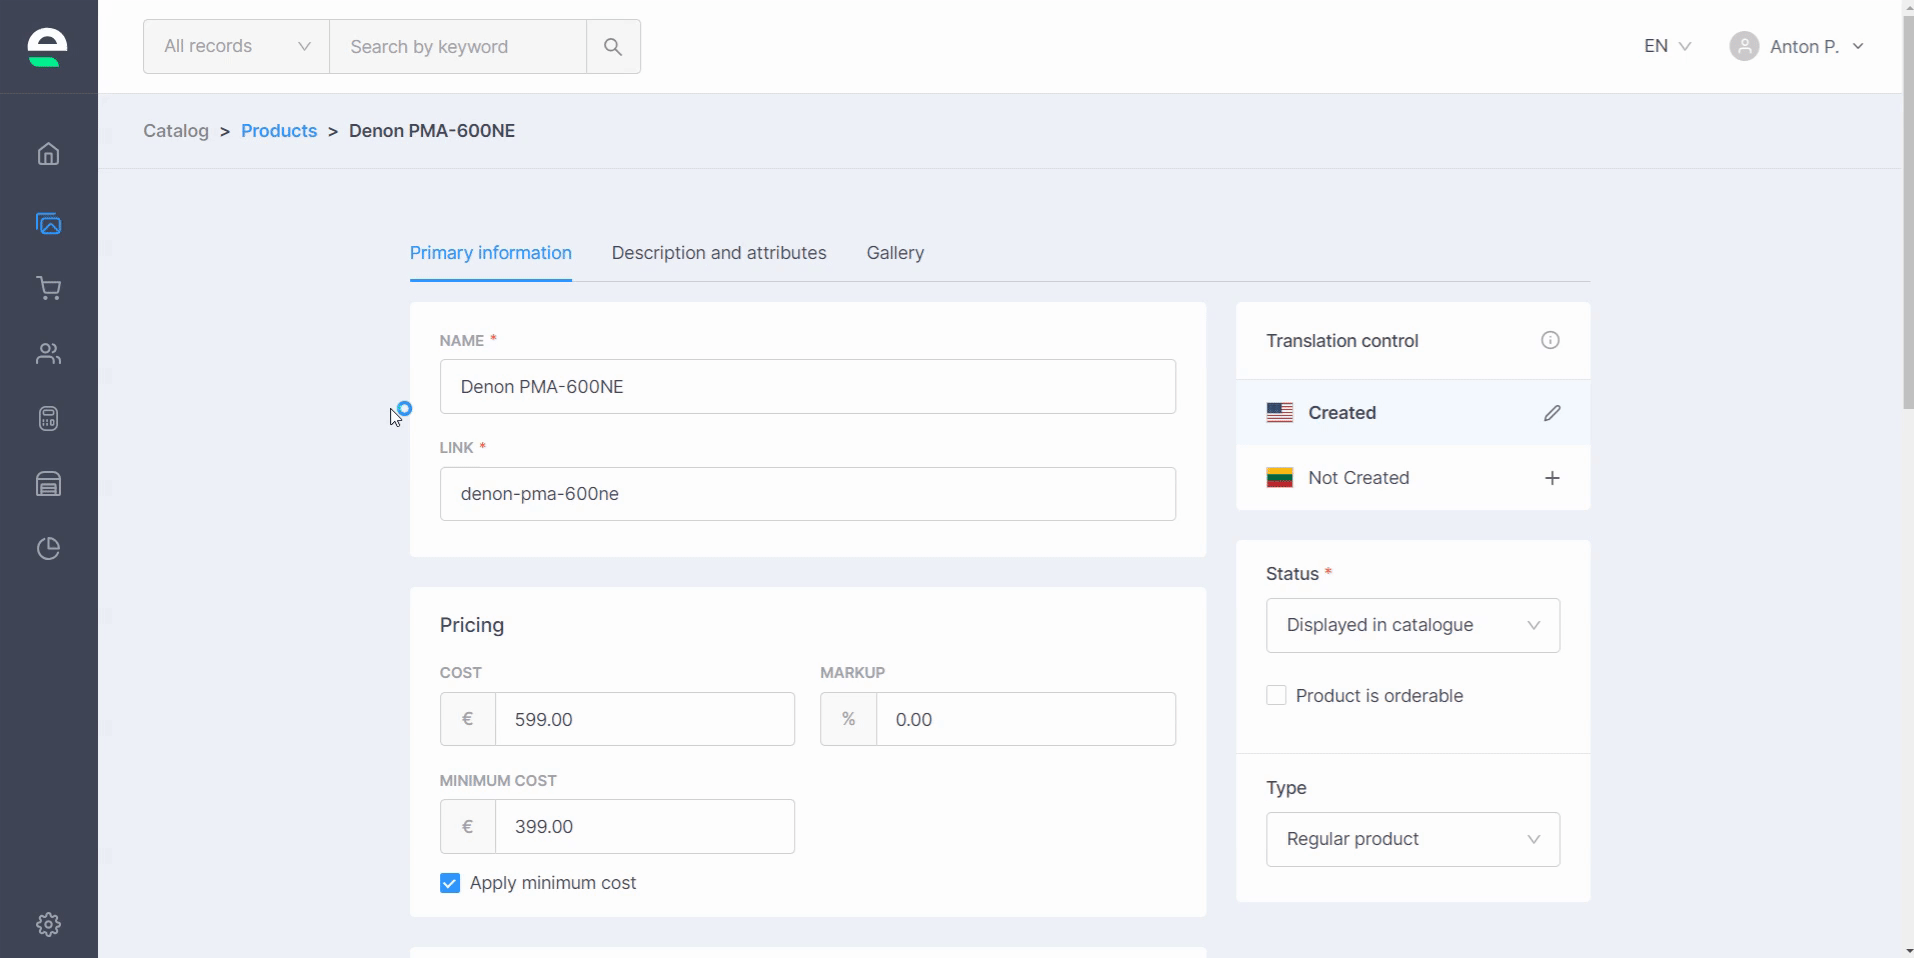
Begin by entering your product's primary information:
- Go to 'Catalog' and then to 'Products'
- Click 'Create'
- Enter a product name as well as a slug
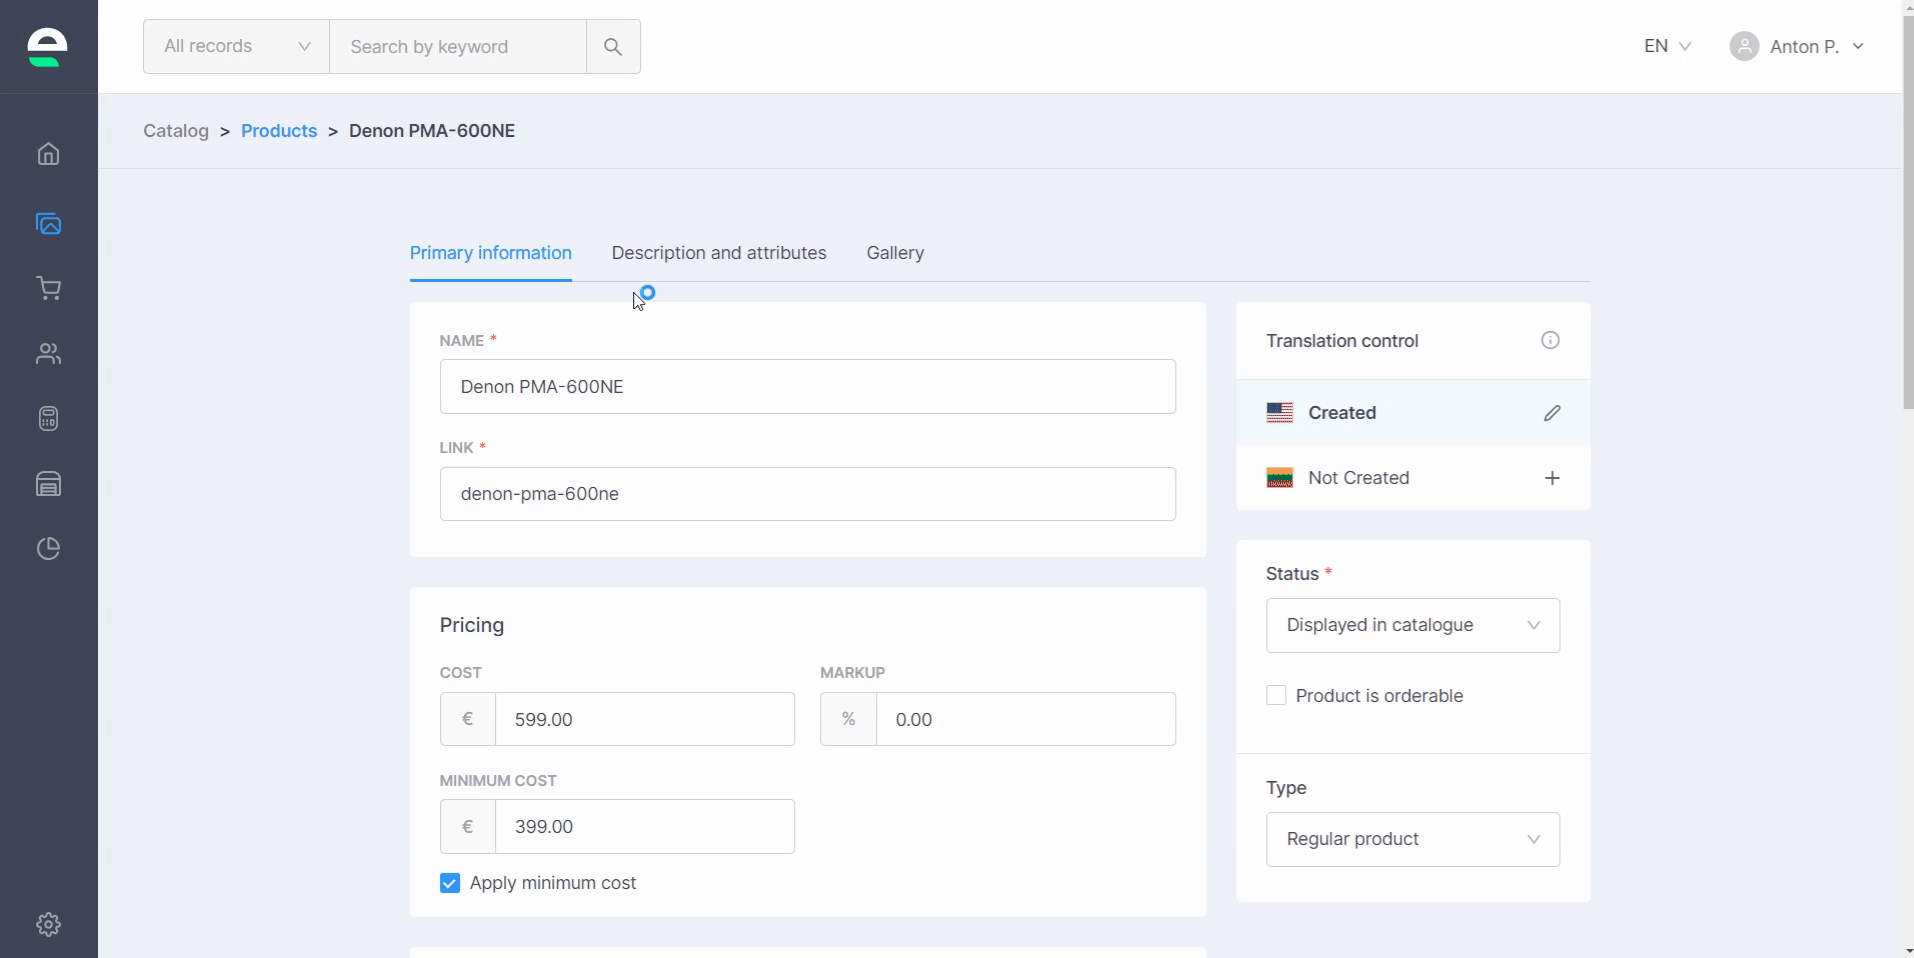
- Enter the product's:
- cost
- prime cost
- markup in the 'Pricing' box below.
- Then, in the 'Inventory control' block, enter the product code, its quantity, and the minimum quantity level. Tick the boxes below if you need to use the backorders or balance tracking functions
- Enter the weight, length, width, and height of the product so that the delivery and warehouse functions work properly
- Click on '+ Add additional row' in the 'Product barcodes' block to add a product barcode
- Click '+ Add category' and select the appropriate category/ies for this product in the pop-up window
- Select whether a product should be displayed or hidden in the catalogue by choosing its status
- Finally, select a 'Product is orderable' option if the customer should be able to order the product, or leave it blank if the product should only be displayed in the product list without the ability to order it
- Click the 'Save' button
If you need to use the minimum cost function, check the box and enter the amount. The minimal cost feature can assist you in avoiding orders with negative profit after markup are applied.
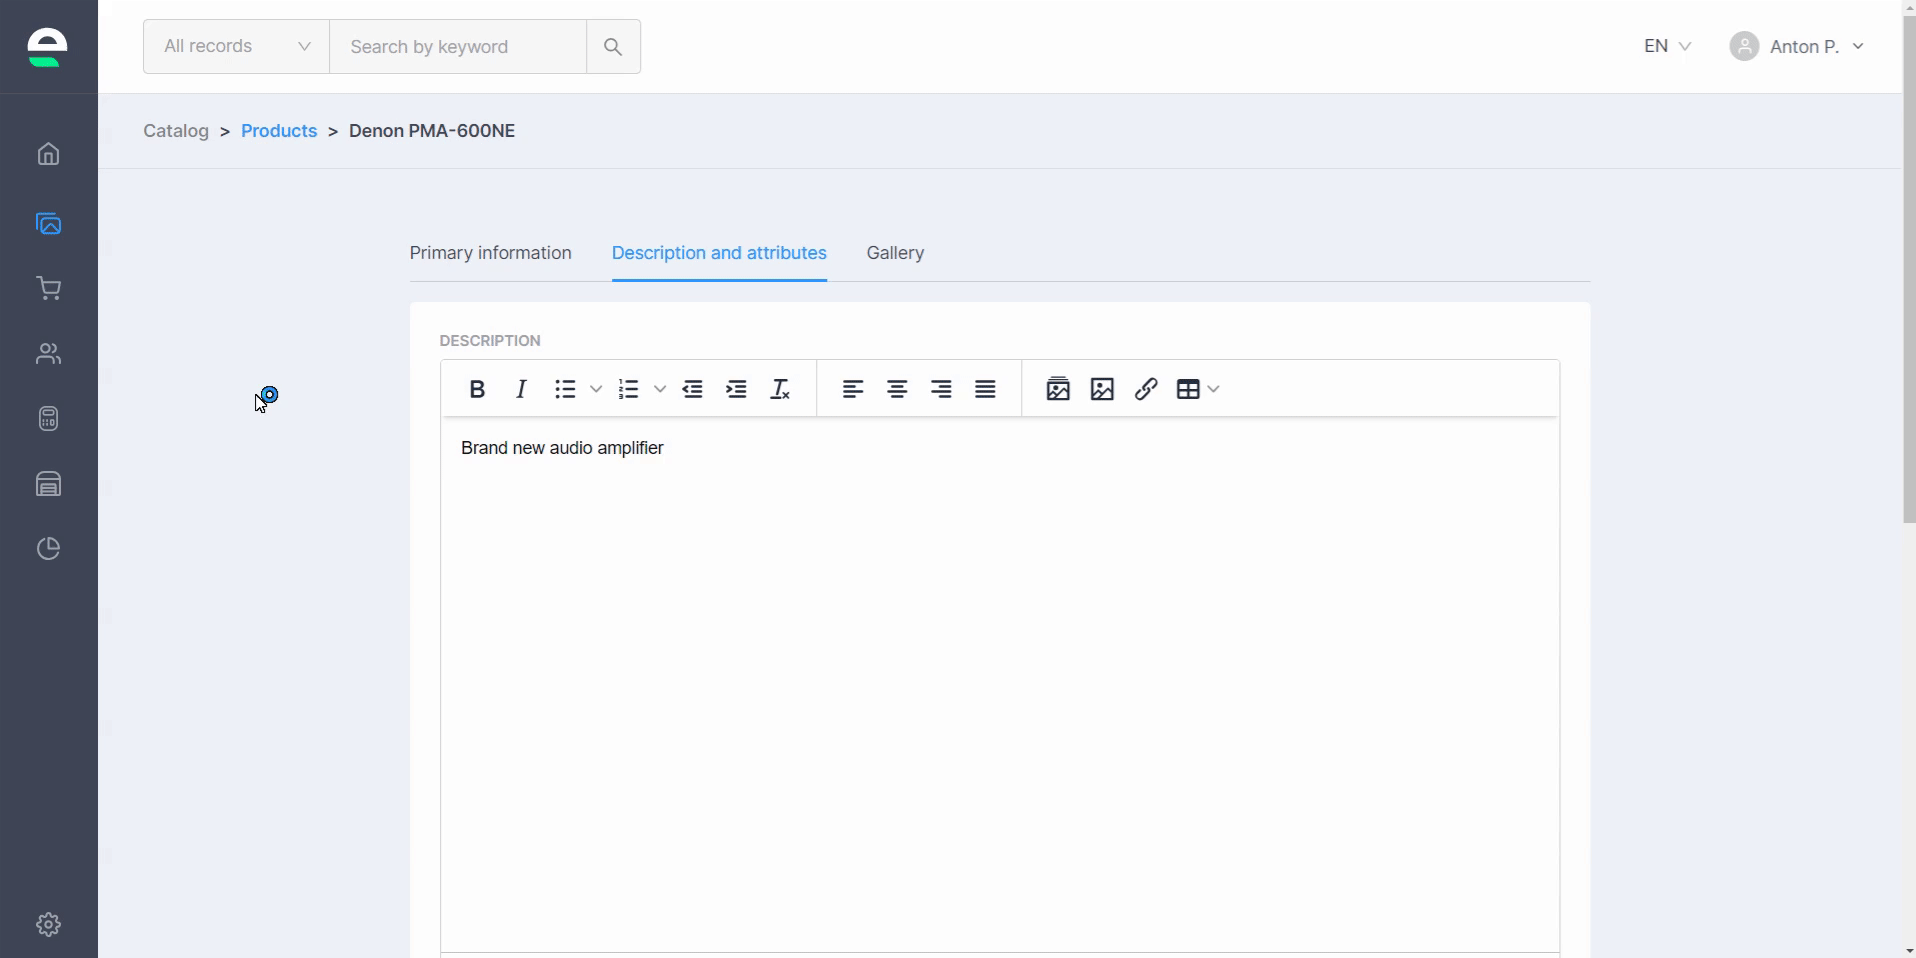
After you've completed the primary information for a product, go to the 'Description and attributes' tab on the right to enter a description and attributes for a new product. By adding attributes here, your customers will be able to filter products in your shop's categories:
In the text box, type a description of a new product. If you want, you can add some images, links, and tables next to it
Then, from the drop-down list, select an attribute/s for your product
Click the 'Save' button
As a final step in the product creation process, navigate to the 'Gallery' tab on the right and upload your product photos:
- Click 'Assign'
- Click the blue ellipsis button in the lower right corner of the new pop-up window
- Select 'Upload files'
- Browse and select photos from your computer (you can choose several photos at once)
- Tick only the photos you want to upload to the product
- Click the 'Assign' button
After you've created your products, you can always edit, add more information or delete them:
- Go to 'Products'
- Click on the product you want to edit
- Edit the information and then click the 'Save' or 'Delete' button to completely remove the product
Bulk actions
Swepio allows you to edit multiple records at once. Follow the steps:
- Go to 'Products'
- Tick the checkboxes next to the records you want to manage in the list
- Select the appropriate action button:
- Activate
- Deactivate
- Duplicate
- Delete
- Confirm your action
Duplicating an item does not duplicate its barcode; each product must have its own individual barcode!
Products with variations
If your product has variations (such as colour, size, texture, and so on), select the 'Product with Variation' product type which will allow your customers to choose the exact product they need. To do so, follow the steps outlined below:
- Go to 'Catalog' and then to 'Products'
- Click on the product to which you want to add variations or create a new product with variatons
- Locate the 'Type' row in the right column and select 'Product with Variations' from the drop-down list
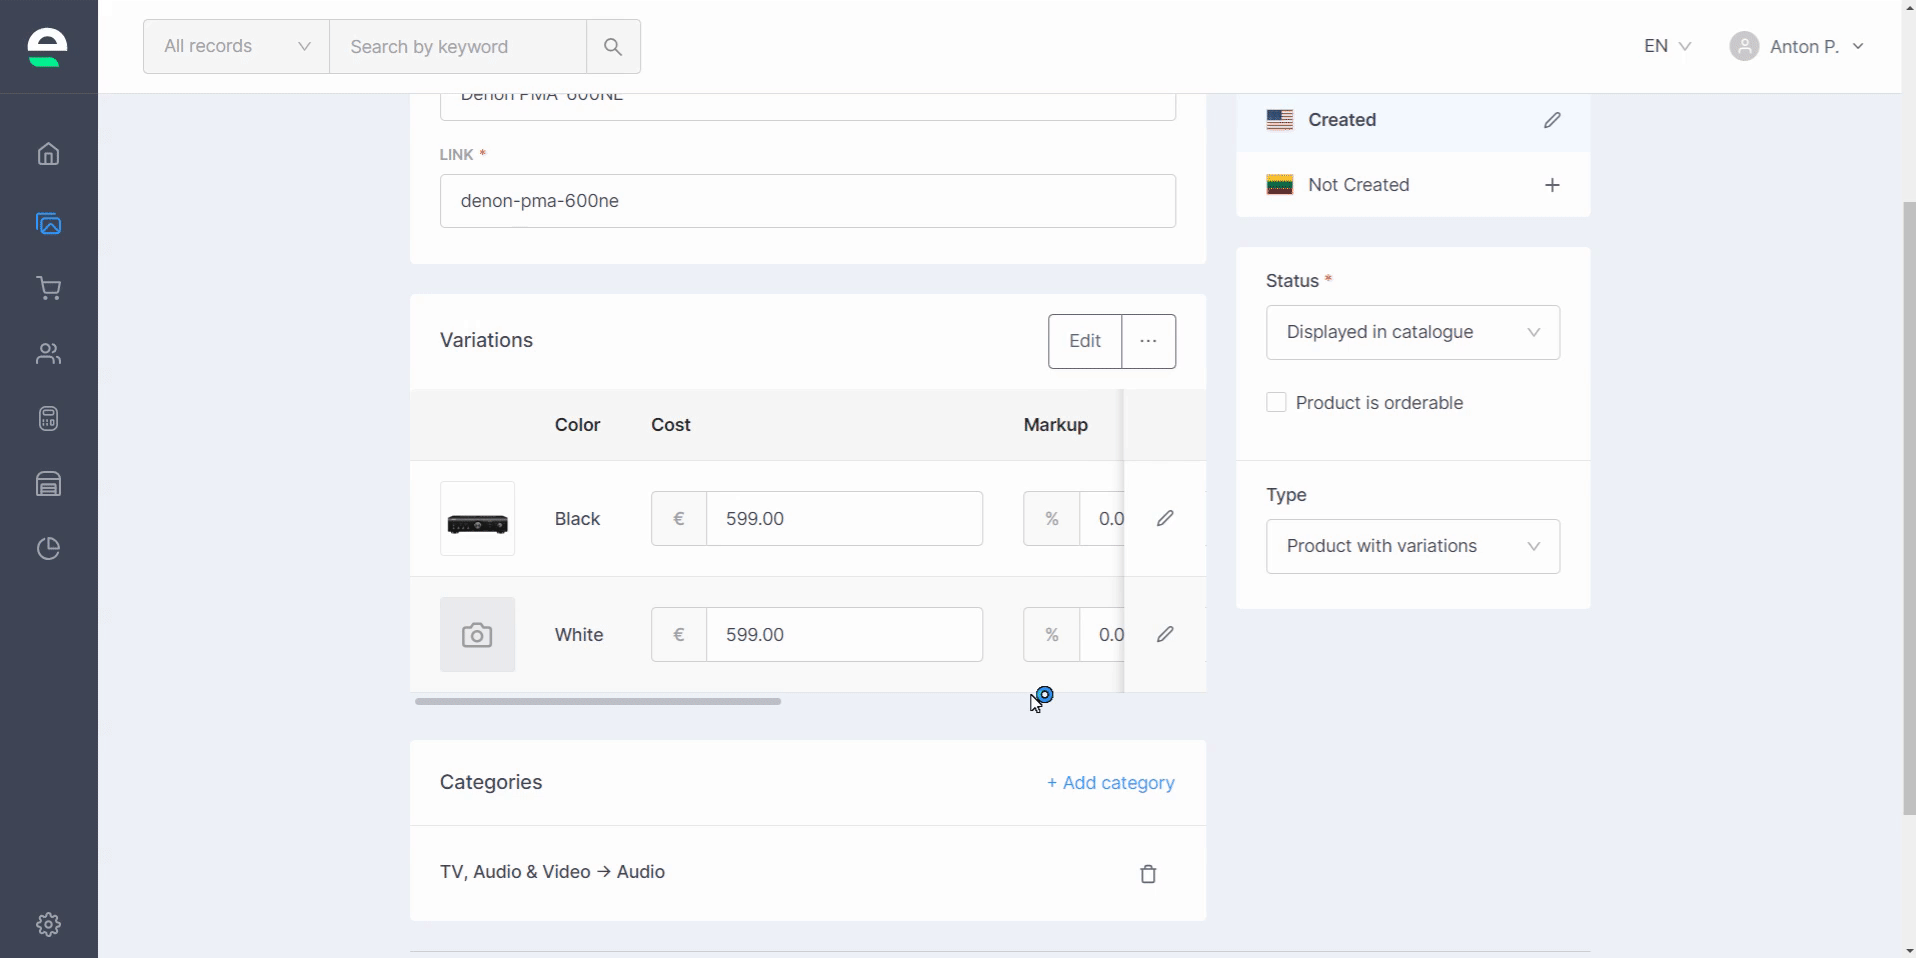
- When the new 'Variations' block appears, click 'Add attribute' and select the attribution group and its values from the list. If a product requires more than one variation, click + Add additional group and select another variation and its values
- Then click the 'Generate variations' button
- Finally, for each product variation, enter the cost, markup, quantity, and product code and click the 'Save' button
After saving all product variations, you can edit each one individually. This option allows you to change the product pricing, inventory control, add a product barcode, and assign a photo to a specific variation. To make these modifications to your variations:
- Go to 'Catalog' and then to 'Products'
- Click on the product whose variations you want to modify
- Click the pencil icon near the variation you want to edit in the variation tab
- Fill in the blanks, then add a barcode and a photo
- Click the 'Save' button
Basically, editing a variant is equivalent to editing a simple product